(Double click on a picture to enlarge)
If anything is to small to see you can double click on a picture
If anything is to small to see you can double click on a picture
First thing I did was come up with some sketchbook ideas


Started with several animal cause I always find them easiest to do develop aswell as robots I had a robot idea on the beginning.


Design of final Character


Also tried fat and skinny aswell which would of changed the way my animation would of turned out

Final design and colour


This is my final character it was idea 2 but with a few changes like the feet has added toes.
Turnarounds
Turnarounds


Color tests/ turn around


Topology
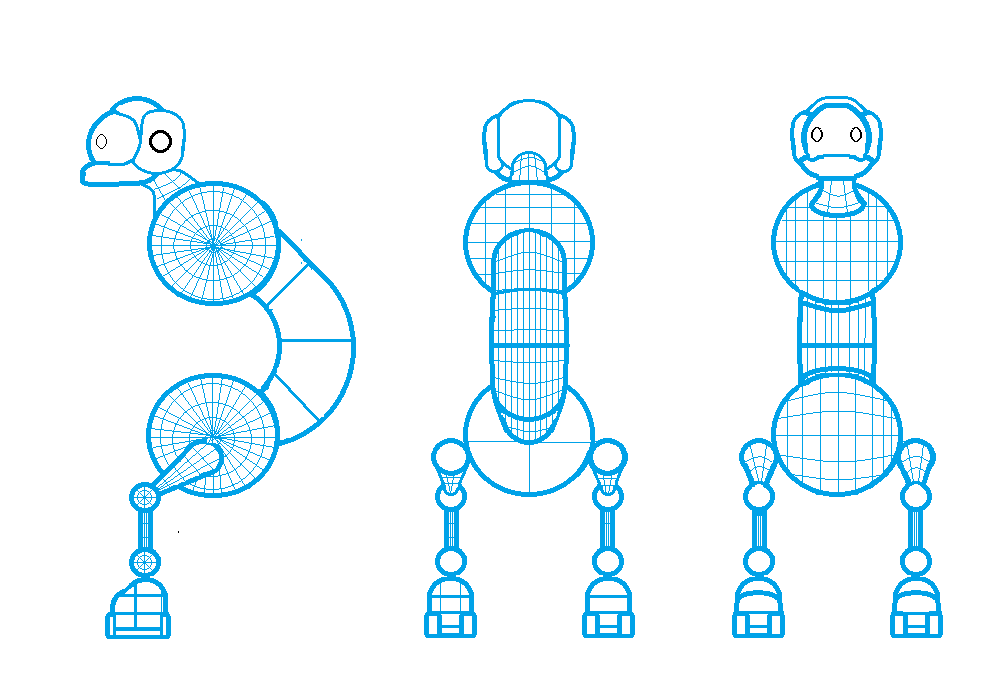
Model

Animatics
Here are the animatics to the animation the final ankimation became a fusion of a three
3D model on Maya


Here is an early attmept at me modelling evereything was easy to make expect the arm which I designed and model 3 or 4 times before get them the way I want.
The wonderful process of Uv mapping

here is my Model with Uv mapping that help show me where everything is.

Pieces of my arm and palm without the thumb

Some problems I faced when uv mapping is that cuting uv which was always a problem and the fact

Here my Uv mapping mostly done
Texturing


This is my try at texturing the problem I had first was that I couldn't get the glass screen to appear I tried turning the opacity down in photoshop which is the program I used to create the texture.

I also copied a metallic texture in photoshop over all the parts that are meant to be metal.
Then I learned that jpeg make fills spaces that should be see through black or white so by changing the file to a Png we got the screen see through however it was causing problems for the texture overall.

This pattern I didn't really like but it did give of a vibe that my character was hot headed.

This Scheme didn't look good

This scheme also didn't look as good as when it was designed in 2D

I liked this on but when i asked others they said it was not a good green

The original

I like this one but I wanted the metal more pearl white and less silver
So by going back to a jpeg I learned that to make parts of my model have different textures I had to assign blinn, hyper shade and anisotropic to selected parts and not have the whole think as a lambert.


After playing with the Lambert, Blinn and Anisotropic a bit I Came up with this as my finial design
Rigging

When rigging I had to make sure that first I was no longer on Polygon mode which is for modelling to Animation.
To rig we had to use the joint tool for the bones after I had to IK the joints and because I was making a robot and I didn't want the legs to bend so I had to first hierarchy the Models Joints ( The spheres that are the hip, Knee and ankles ) and then Rigid Bind the Legs (cylinders) and the feet.
Then I had to create controllers to make it easier to move the legs
The spines, Arms and Fuse had used smooth bind instead of rigid.
For the Hands I had to use the set Driven keys


This is what my hand looked like after The skin was attached

Wire frame

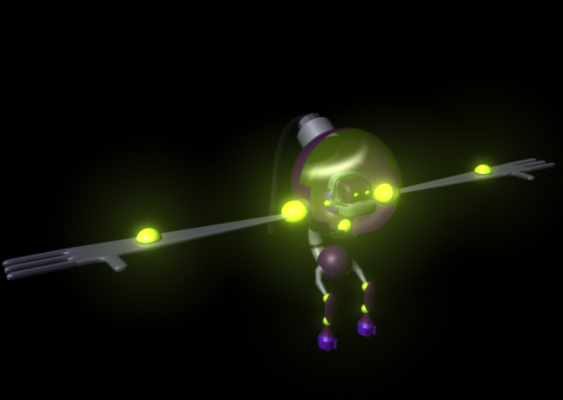
Rendered version


No comments:
Post a Comment